
Installation and Maintenance: Keeping Your Kinetic Wall Shimmering for Years
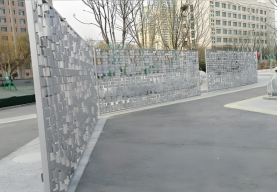
A kinetic wall, also known as a wind-driven wall or shimmer wall, is more than just a decorative element—it’s a dynamic fusion of art, engineering, and nature that brings buildings to life with every gust of wind. Whether you’ve invested in an outdoor shimmer wall for a commercial facade, a residential patio, or a public space, its long-term beauty and functionality depend not just on the quality of the product itself, but also on proper installation and consistent maintenance. As the old saying goes, “Buying well is only half the battle; installing well and maintaining well is the other half.” This comprehensive kinetic wall installation guide is designed to share practical, long-term operation experience, covering every critical step from pre-installation preparation to daily upkeep, helping you maximize the lifespan of your kinetic wall, maintain its shimmering appearance, and ensure its structural integrity for years to come.
Kinetic walls have gained immense popularity in recent years, thanks to their ability to add movement, visual interest, and a touch of elegance to any space. Unlike static walls, wind-driven walls respond to natural wind currents, creating a mesmerizing, flowing effect that captivates onlookers. However, this dynamic nature also means that kinetic walls have unique installation and maintenance requirements. From ensuring the墙体 (wall) can support the weight of the system to addressing noise issues in high winds, from protecting against corrosion in harsh environments to verifying wind load requirements for kinetic facades, every detail matters. This guide will break down each step in detail, integrating core keywords like kinetic facade maintenance cost, wind-driven wall durability, and outdoor shimmer wall price, as well as长尾关键词 (long-tail keywords) and LSI terms such as rust resistance, stainless steel fasteners, mounting brackets, decibel levels, corrosion protection, and structural integrity, ensuring you have all the information you need to keep your kinetic wall in top condition.
Pre-Installation Checklist: Wall Load-Bearing, Wind Direction Assessment, and Bracket Preparation
The success of your kinetic wall installation starts long before the first panel is mounted. Proper pre-installation preparation is the foundation of a durable, long-lasting system, as it addresses potential issues that could lead to premature failure, safety hazards, or costly repairs down the line. This phase focuses on three core areas: assessing the wall’s load-bearing capacity, evaluating wind direction and intensity, and preparing high-quality mounting brackets and hardware. Skipping any of these steps can compromise the structural integrity of your kinetic wall and void its warranty.
1.1 Wall Load-Bearing Capacity Assessment
Before installing any kinetic wall system, it’s critical to verify that the existing墙体 (wall) or mounting surface can support the weight of the system. Kinetic walls, especially large outdoor shimmer walls, consist of modular panels, mounting brackets, and hardware, which can add significant weight to the structure. Ignoring load-bearing requirements can result in wall damage, panel detachment, or even structural collapse—risks that are entirely avoidable with proper assessment.
First, you need to obtain the total weight of your kinetic wall system. This information is typically provided by the manufacturer, but it’s important to confirm it, as it varies based on the size, material, and design of the panels. For example, a standard aluminum kinetic panel weighs between 2-4 pounds per square foot, while a stainless steel panel may weigh 5-8 pounds per square foot. A 100-square-foot outdoor shimmer wall could weigh anywhere from 200 to 800 pounds, not including the weight of mounting brackets and stainless steel fasteners.
Next, you need to assess the load-bearing capacity of the mounting surface. This involves consulting a structural engineer, especially for commercial buildings or older structures, to ensure the wall can support the additional weight. For concrete walls, the load-bearing capacity is typically high—concrete can usually support 100-200 pounds per square foot—but it’s still important to verify. For wooden walls or drywall, additional support may be required, such as installing backing boards or reinforcing studs. For brick or masonry walls, you’ll need to ensure the bricks are in good condition (no cracks or deterioration) and that the mortar is strong enough to hold the mounting brackets.
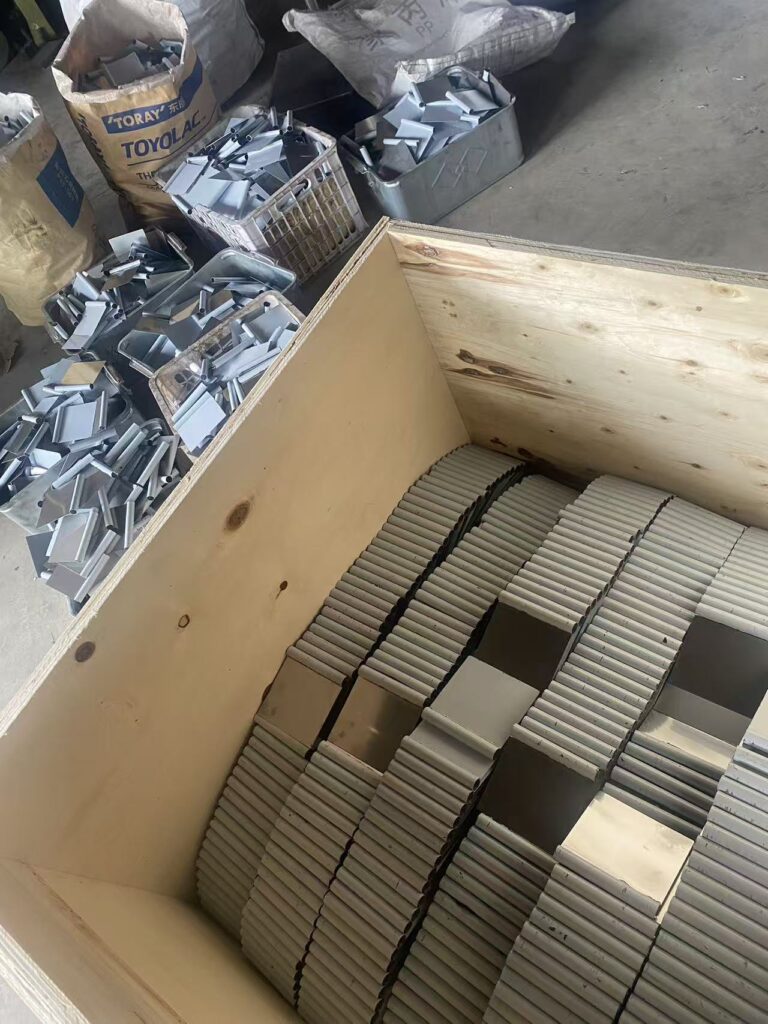
Table 1 below outlines the typical load-bearing capacities of common mounting surfaces and the recommended kinetic wall weight limits for each. This table will help you quickly determine if your wall can support your chosen kinetic wall system, or if additional reinforcement is needed.
| Mounting Surface | Typical Load-Bearing Capacity (lbs/sq ft) | Recommended Maximum Kinetic Wall Weight (lbs/sq ft) | Additional Reinforcement Needed? |
|---|---|---|---|
| Concrete (Poured) | 150-200 | 80-100 | No, unless wall is cracked or damaged |
| Brick/Masonry | 100-150 | 50-70 | Yes, if mortar is old or deteriorated |
| Wooden Stud Wall (2×4 Studs, 16” On Center) | 40-60 | 20-30 | Yes, add backing boards or additional studs |
| Drywall (No Backing) | 10-20 | 5-10 | Yes, must add backing boards or reinforce with studs |
| Steel Framing | 120-180 | 70-90 | No, if framing is in good condition |
It’s important to note that the load-bearing capacity can also be affected by the age of the structure, environmental damage (such as water damage or corrosion), and the location of the mounting (e.g., upper floors vs. ground level). A structural engineer can conduct a thorough assessment, including testing the wall’s strength and identifying any weak points, to ensure your kinetic wall installation is safe and secure. This step is especially critical for outdoor wind-driven walls, which are exposed to additional forces from wind and weather, putting extra stress on the mounting surface and structural integrity.
1.2 Wind Direction and Intensity Assessment
Wind is the driving force behind a kinetic wall’s movement, but it can also be its greatest enemy if not properly accounted for. Assessing wind direction and intensity in your area is essential for choosing the right kinetic wall design, determining the optimal installation location, and ensuring wind-driven wall durability. This assessment will also help you address potential noise issues (a common concern with the长尾关键词 “Are kinetic walls noisy in high winds?”) and verify that your system meets wind load requirements for kinetic facades.
Start by researching the average wind speed in your area. You can find this information from local weather stations, the National Weather Service (in the U.S.), or regional meteorological agencies. Most kinetic wall manufacturers design their systems to withstand specific wind speeds—typically between 70-120 miles per hour (mph). For example, a standard outdoor shimmer wall may be rated for 90 mph, while a heavy-duty commercial system can handle up to 120 mph. If your area experiences frequent high winds (such as coastal regions or areas prone to hurricanes/typhoons), you’ll need a system with a higher wind rating to ensure durability.
Next, assess the dominant wind direction. This will help you determine where to install the kinetic wall to maximize its movement (for aesthetic purposes) and minimize stress on the system. For example, if the dominant wind direction is from the west, installing the kinetic wall on the west-facing facade will ensure it moves consistently, creating the desired shimmer effect. Conversely, installing a kinetic wall on a sheltered side of the building (where wind is minimal) may result in little to no movement, reducing its visual appeal.
You should also consider wind turbulence, which can cause uneven movement, excessive noise, or even damage to the kinetic wall panels. Turbulence is common in urban areas, where buildings, trees, and other structures disrupt wind flow. If your installation site is in a turbulent area, you may need to adjust the panel spacing, choose a more flexible panel design, or install wind deflectors to reduce turbulence. Additionally, areas with sudden gusts (such as mountainous regions or near bodies of water) require extra consideration, as these gusts can put sudden stress on the mounting brackets and stainless steel fasteners, compromising structural integrity.
To make this assessment easier, you can use a wind anemometer to measure wind speed and direction at the installation site over a period of 1-2 weeks. This will give you accurate, real-time data to share with the kinetic wall manufacturer, who can then recommend the best system for your specific location. Table 2 below outlines common wind speed categories and the recommended kinetic wall specifications for each, helping you align your system with your area’s wind conditions.
| Wind Speed Category | Average Wind Speed (mph) | Recommended Kinetic Wall Wind Rating (mph) | Additional Considerations |
|---|---|---|---|
| Calm to Mild | 0-20 | 70-80 | Standard kinetic wall system; minimal turbulence concerns |
| Moderate | 21-40 | 80-90 | Choose flexible panels to handle consistent wind flow |
| High Winds | 41-60 | 90-100 | Reinforce mounting brackets; consider wind deflectors |
| Severe (Hurricane/Typhoon Prone) | 61+ | 100-120+ | Heavy-duty stainless steel fasteners; corrosion protection; wind lockout mode |
By conducting a thorough wind assessment, you’ll not only ensure that your kinetic wall is durable and long-lasting but also optimize its performance, creating the beautiful, dynamic movement that makes these walls so popular. This step also lays the groundwork for addressing noise issues later, as understanding wind patterns helps you design a system that minimizes noise from panel movement.
1.3 Mounting Bracket and Hardware Preparation
Mounting brackets and hardware are the unsung heroes of a kinetic wall installation—they hold the entire system together, ensuring structural integrity and stability. Choosing the right mounting brackets, stainless steel fasteners, and other hardware is critical for wind-driven wall durability, as poor-quality or improper hardware can lead to panel detachment, noise, and even system failure. This section will cover the key considerations for selecting and preparing mounting brackets and hardware, integrating LSI terms like stainless steel fasteners, mounting brackets, and corrosion protection.
First, choose high-quality mounting brackets that are designed specifically for kinetic walls. These brackets should be made from durable materials, such as stainless steel or aluminum, to ensure rust resistance and corrosion protection—especially important for outdoor installations exposed to rain, snow, or coastal salt雾 (salt spray). Stainless steel is the preferred material for brackets and fasteners, as it offers excellent rust resistance and strength, even in harsh environments. Avoid using low-quality steel or plastic brackets, as they can degrade over time, leading to system failure.
The type of mounting bracket you choose will depend on your mounting surface and the kinetic wall system. For concrete or brick walls, you’ll need expansion brackets or anchor bolts that can penetrate the surface and provide a secure hold. For wooden walls, lag screws or wood screws are typically used, along with backing boards to distribute the weight evenly. For steel framing, you can use welding brackets or bolt-on brackets, depending on the design of the frame.
It’s also important to ensure that the mounting brackets are properly sized for your kinetic wall system. The brackets should be able to support the weight of the panels and withstand the force of wind, so they need to be strong enough to handle both static and dynamic loads. The manufacturer will typically provide specifications for the required bracket size and spacing, so be sure to follow these guidelines closely. For example, a 10-foot wide kinetic wall may require brackets every 12-18 inches to ensure even weight distribution and stability.
In addition to mounting brackets, you’ll need high-quality stainless steel fasteners, such as bolts, screws, and washers. These fasteners should be corrosion-resistant, as they will be exposed to the elements. Stainless steel fasteners are ideal, as they resist rust and corrosion, even in coastal or high-humidity environments. Avoid using galvanized steel fasteners, as they can corrode over time, especially in saltwater environments.
Before installation, inspect all mounting brackets and hardware for any defects, such as cracks, bends, or rust. Even minor defects can compromise the structural integrity of the system, so it’s important to replace any damaged hardware before proceeding. You should also pre-drill holes in the mounting surface (if necessary) to ensure that the fasteners go in smoothly and do not damage the wall. Pre-drilling is especially important for concrete or brick walls, as it prevents the material from cracking.
Table 3 below outlines the recommended mounting brackets and hardware for different mounting surfaces, helping you choose the right components for your installation. This table also includes tips for corrosion protection and rust resistance, ensuring your hardware lasts as long as your kinetic wall.
| Mounting Surface | Recommended Mounting Brackets | Recommended Stainless Steel Fasteners | Corrosion Protection Tips |
|---|---|---|---|
| Concrete | Expansion brackets, anchor bolts | Stainless steel expansion bolts, washers | Apply anti-corrosion coating to bolt heads; use stainless steel hardware |
| Brick/Masonry | Masonry brackets, sleeve anchors | Stainless steel sleeve anchors, lag screws | Seal around fasteners with silicone caulk to prevent water intrusion |
| Wooden Stud Wall | Wooden brackets, metal angle brackets | Stainless steel lag screws, wood screws | Treat wood with water-resistant sealant; use galvanized or stainless steel fasteners |
| Steel Framing | Welding brackets, bolt-on brackets | Stainless steel bolts, nuts, washers | Welds should be sealed with anti-corrosion paint; use stainless steel hardware |
By taking the time to prepare high-quality mounting brackets and hardware, you’ll ensure that your kinetic wall is securely attached to the mounting surface, able to withstand wind and weather, and free from noise caused by loose or damaged hardware. This step is critical for the long-term durability of your system and will help you avoid costly repairs later on.
Step-by-Step Installation: The Easy-to-Install Modular System
One of the key advantages of modern kinetic walls is their easy-to-install modular system, which simplifies the installation process and reduces the need for specialized tools or expertise. Unlike traditional static walls, which require extensive construction and customization, kinetic wall systems are designed with modular panels that can be quickly and easily mounted to the prepared surface. This section will walk you through the step-by-step installation process, answering the长尾关键词 “How to install a kinetic facade step by step” and providing practical tips to ensure a smooth, successful installation. We’ll also integrate core keywords like kinetic wall installation guide and outdoor shimmer wall price, as well as LSI terms like structural integrity and mounting brackets.
Before you begin the installation, make sure you have all the necessary tools and materials on hand. This includes: the modular kinetic panels, mounting brackets, stainless steel fasteners, a drill, a level, a tape measure, a screwdriver, a wrench, and safety equipment (gloves, goggles, and a ladder or scaffolding for high installations). You should also have the manufacturer’s installation instructions, as different systems may have slight variations in the installation process. Additionally, if you’re installing an outdoor shimmer wall, consider the outdoor shimmer wall price and ensure you have allocated budget for any additional tools or materials needed.
2.1 Step 1: Mark the Mounting Locations
The first step in the installation process is to mark the locations where the mounting brackets will be installed. This ensures that the brackets are evenly spaced and aligned, which is critical for the structural integrity of the kinetic wall. Start by measuring the width and height of the installation area and marking the center point. From the center point, measure outwards to mark the locations of the first set of brackets, following the manufacturer’s recommended spacing (typically 12-18 inches apart horizontally and vertically).
Use a level to ensure that the marks are straight and aligned. If the brackets are not level, the kinetic panels will not hang correctly, which can cause uneven movement, noise, or even panel damage. For large installations, it’s helpful to use a chalk line to mark the horizontal and vertical lines, ensuring that all brackets are aligned perfectly. Take your time with this step—precision here will save you time and frustration later.
It’s also important to mark the locations of any obstacles, such as windows, doors, or electrical outlets, to avoid installing brackets in these areas. If you encounter an obstacle, adjust the bracket spacing accordingly, ensuring that the weight of the kinetic wall is still evenly distributed. For example, if a window is in the middle of the installation area, you may need to move the brackets to either side of the window and add additional brackets to maintain stability.
2.2 Step 2: Install the Mounting Brackets
Once the mounting locations are marked, it’s time to install the mounting brackets. This step will vary slightly depending on the mounting surface, but the general process is the same: pre-drill holes (if necessary), attach the brackets to the wall using stainless steel fasteners, and ensure they are secure and level.
For concrete or brick walls: Pre-drill holes using a masonry drill bit that matches the size of the expansion bolts or sleeve anchors. Insert the anchors into the holes, then attach the brackets to the anchors using bolts and washers. Tighten the bolts securely with a wrench, ensuring that the brackets are level and flush against the wall. Be careful not to over-tighten the bolts, as this can crack the concrete or brick.
For wooden walls: Pre-drill holes (to prevent the wood from splitting) and attach the brackets using stainless steel lag screws or wood screws. If the wall has backing boards, ensure the screws penetrate the backing boards to provide a secure hold. Tighten the screws until the brackets are flush against the wall, and use a level to verify they are straight.
For steel framing: Attach the brackets using welding or bolt-on fasteners. If welding, ensure the welds are strong and secure, and seal them with anti-corrosion paint to prevent rust. If using bolt-on fasteners, pre-drill holes in the steel framing and attach the brackets with stainless steel bolts and nuts.
After installing each bracket, give it a gentle tug to ensure it is secure. If a bracket feels loose, tighten the fasteners or adjust the anchor to ensure a firm hold. It’s also a good idea to check the level of each bracket again after installation, as slight movement can occur during the tightening process.
2.3 Step 3: Attach the Modular Kinetic Panels
With the mounting brackets installed, it’s time to attach the modular kinetic panels. The easy-to-install modular system is designed so that the panels can be snapped or bolted onto the brackets quickly and easily, without the need for specialized tools. Most kinetic wall panels have a built-in mounting system, such as clips or slots, that align with the mounting brackets.
Start by installing the bottom row of panels first, working from left to right. Align the panel’s mounting clips or slots with the brackets, then push or snap the panel into place. For panels that require bolts, insert the stainless steel bolts through the panel’s mounting holes and into the brackets, then tighten them securely with a wrench. Be careful not to over-tighten the bolts, as this can damage the panel or the brackets.
Once the bottom row is installed, move on to the next row, ensuring that each panel is aligned with the one below it. Most modular panels have a tongue-and-groove design that allows them to fit together seamlessly, creating a smooth, uniform appearance. Check the alignment of each panel with a level to ensure they are straight and even. If a panel is misaligned, adjust it before moving on to the next one.
For large installations, it’s helpful to have a helper to assist with lifting and positioning the panels, especially if the panels are heavy or the installation is high off the ground. Safety is a top priority here—always use a ladder or scaffolding when installing panels at height, and wear gloves to protect your hands from sharp edges.
As you install each panel, test its movement by gently pushing it with your hand. The panel should move freely and smoothly, without any resistance or noise. If a panel is stuck or makes a grinding noise, check the mounting clips or bolts to ensure they are not too tight. Adjust the fasteners as needed to allow for smooth movement.
2.4 Step 4: Secure the Panels and Check for Stability
Once all the panels are installed, it’s time to secure them and check the overall stability of the kinetic wall. This step is critical for ensuring wind-driven wall durability and structural integrity, especially for outdoor installations.
First, go back and check all the fasteners (both for the brackets and the panels) to ensure they are tight and secure. Loose fasteners can cause noise, uneven movement, or even panel detachment, so it’s important to tighten any loose bolts or screws. You may also want to add lock washers to the fasteners to prevent them from loosening over time due to wind vibration.
Next, test the movement of the entire kinetic wall by gently blowing on the panels or using a fan to simulate wind. The panels should move in a smooth, coordinated manner, without any sticking or jamming. If you notice any panels that are not moving freely, check the mounting clips or brackets for obstructions (such as dirt or debris) and clean them if necessary. You may also need to adjust the panel spacing to ensure there is enough room for movement.
Finally, inspect the entire installation for any signs of instability or damage. Check the mounting brackets for any bending or cracking, and ensure the wall is not sagging or pulling away from the mounting surface. If you notice any issues, address them immediately to prevent further damage.
2.5 Step 5: Final Touches and Cleanup
The final step in the installation process is to add any finishing touches and clean up the work area. If your kinetic wall has trim pieces or edge caps, install them now to cover any exposed brackets or fasteners, creating a clean, polished look. Trim pieces also help to protect the edges of the panels from damage and prevent dirt and debris from getting into the mounting system.
Once the trim is installed, clean the kinetic panels using a soft cloth and mild detergent (if needed) to remove any dirt, dust, or fingerprints. Avoid using harsh chemicals or abrasive cleaners, as these can damage the panel’s surface and reduce rust resistance. For outdoor installations, you may also want to rinse the panels with a hose to remove any debris.
Finally, clean up the work area, removing any tools, materials, or debris. Dispose of any packaging or waste properly, and ensure that the area is safe and free from hazards.
By following these step-by-step instructions, you can easily install your kinetic wall using the modular system, ensuring a secure, stable, and visually appealing result. This installation process is designed to be accessible to both DIY enthusiasts and professional installers, and it ensures that your kinetic wall will provide years of dynamic beauty and functionality. Remember, proper installation is the first step in ensuring wind-driven wall durability and minimizing future maintenance costs.
Managing Noise Levels: How to Solve Wind-Triggered Blade Noise with Shock Absorption Design
One of the most common concerns among kinetic wall owners is noise—specifically, the question “Are kinetic walls noisy in high winds?” While kinetic walls are designed to move with the wind, excessive noise can be a nuisance, especially for residential areas or commercial spaces where quiet is important. The good news is that with proper shock absorption design and careful installation, you can significantly reduce or eliminate noise from wind-driven kinetic wall panels. This section will explore the causes of kinetic wall noise, explain how shock absorption design works, and provide practical tips for managing noise levels, integrating core keywords like wind-driven wall durability and LSI terms like decibel levels, stainless steel fasteners, and mounting brackets.
3.1 What Causes Kinetic Wall Noise?
Before we can solve the noise problem, it’s important to understand what causes it. Kinetic wall noise typically comes from three main sources: panel-to-panel contact, panel-to-bracket contact, and vibration from wind turbulence. Let’s break down each source in detail:
1. Panel-to-Panel Contact: When wind blows, the kinetic panels move and may collide with each other, creating a clattering or rattling noise. This is most common when the panels are too close together, or when they are not properly aligned. The noise can range from a mild rattle to a loud clatter, depending on the wind speed and the material of the panels.
2. Panel-to-Bracket Contact: If the panels are not properly mounted, or if the mounting brackets are loose, the panels may rub against the brackets as they move, creating a squeaking or grinding noise. This is often caused by loose stainless steel fasteners, misaligned brackets, or a lack of shock absorption between the panel and the bracket.
3. Vibration from Wind Turbulence: Wind turbulence can cause the kinetic wall to vibrate, which can transmit noise to the building structure. This vibration is often felt more than heard, but it can still be a nuisance, especially in sensitive areas like bedrooms or offices. Turbulence-induced vibration can also damage the mounting brackets and fasteners over time, compromising structural integrity.
The decibel levels of kinetic wall noise vary depending on the wind speed and the design of the system. In mild winds (20-30 mph), the noise is typically between 30-40 decibels (dB)—about the same as a quiet conversation. In high winds (50+ mph), the noise can reach 50-60 dB—about the same as a moderate rainstorm. For reference, 60 dB is considered the threshold of comfortable noise for most people, so it’s important to keep noise levels below this threshold, especially in residential areas.
3.2 How Shock Absorption Design Reduces Noise
Shock absorption design is the key to reducing kinetic wall noise. By adding shock-absorbing materials between the panels, between the panels and the brackets, and within the mounting system, you can dampen vibrations, prevent contact between moving parts, and reduce noise significantly. Here are the most effective shock absorption design strategies:
1. Shock-Absorbing Pads Between Panels: Adding small, durable shock-absorbing pads (made from rubber, neoprene, or foam) between the edges of the kinetic panels prevents them from colliding with each other. These pads act as a buffer, absorbing the impact of moving panels and reducing clattering noise. The pads should be placed along the edges of the panels, where contact is most likely to occur. They should be weather-resistant to ensure they last in outdoor environments.
2. Shock-Absorbing Mounts for Brackets: Installing shock-absorbing mounts between the mounting brackets and the panels can reduce noise from panel-to-bracket contact. These mounts are typically made from rubber or neoprene and are placed between the panel’s mounting clips and the bracket. They absorb vibration and prevent the panel from rubbing against the bracket, eliminating squeaking and grinding noises. Shock-absorbing mounts also help to protect the stainless steel fasteners from vibration damage, improving wind-driven wall durability.
3. Flexible Panel Design: Choosing kinetic panels with a flexible design can also reduce noise. Flexible panels (made from materials like aluminum or polycarbonate) move more smoothly with the wind, reducing the likelihood of sudden impacts and noise. Rigid panels (like stainless steel) are more likely to create noise when they collide, so flexible panels are a better choice for noise-sensitive areas.
4. Proper Panel Spacing: Ensuring that the kinetic panels are spaced correctly can prevent contact between them, reducing noise. The manufacturer will typically recommend a specific spacing between panels (usually 1/4 to 1/2 inch) to allow for movement without contact. Following this spacing guideline is critical for reducing noise and ensuring smooth movement.
5. Wind Deflectors: Installing wind deflectors around the kinetic wall can reduce wind turbulence, which in turn reduces vibration and noise. Wind deflectors are typically made from metal or plastic and are mounted above or around the kinetic wall to redirect wind flow, creating a smoother, more consistent wind pattern. This not only reduces noise but also improves the movement of the panels, creating a more mesmerizing shimmer effect.
3.3 Practical Tips for Managing Noise Levels
In addition to shock absorption design, there are several practical tips you can follow to manage noise levels from your kinetic wall:
1. Regularly Inspect and Tighten Fasteners: Loose stainless steel fasteners can cause panels to move excessively, leading to noise. Check the fasteners on the mounting brackets and panels every 3-6 months, and tighten any that are loose. This will not only reduce noise but also improve structural integrity and wind-driven wall durability.
2. Clean the Panels and Brackets: Dirt, dust, and debris can accumulate between the panels and brackets, causing friction and noise. Clean the panels and brackets regularly using a soft cloth and mild detergent, and remove any debris that may be causing obstruction. This will ensure smooth movement and reduce noise.
3. Adjust Panel Spacing: If you notice that the panels are colliding frequently, adjust the spacing between them to ensure there is enough room for movement. This may require removing and repositioning the panels, but it will significantly reduce noise.
4. Replace Worn Shock-Absorbing Materials: Over time, shock-absorbing pads and mounts can wear out, reducing their effectiveness. Replace any worn or damaged shock-absorbing materials every 1-2 years (or as needed) to maintain noise reduction.
5. Choose the Right Location: If possible, install the kinetic wall in a location that is sheltered from strong winds or turbulence. This will reduce the amount of movement and noise, especially in high-wind areas. For example, installing the wall on a side of the building that is protected by trees or other structures can help reduce wind intensity.
Table 4 below outlines common noise issues, their causes, and solutions, helping you quickly identify and address any noise problems with your kinetic wall.
| Noise Issue | Cause | Solution |
|---|---|---|
| Clattering/Rattling | Panel-to-panel contact; improper spacing | Add shock-absorbing pads; adjust panel spacing |
| Squeaking/Grinding | Panel-to-bracket contact; loose fasteners | Install shock-absorbing mounts; tighten fasteners |
| Vibration Noise | Wind turbulence; poor shock absorption | Install wind deflectors; add shock-absorbing materials |
| Loud Noise in High Winds | Excessive panel movement; rigid panel design | Choose flexible panels; add wind deflectors |
By implementing these shock absorption design strategies and practical tips, you can effectively manage noise levels from your kinetic wall, ensuring that it remains a beautiful, dynamic addition to your space without being a nuisance. Remember, noise management is an important part of wind-driven wall durability, as excessive noise can be a sign of underlying issues (like loose fasteners or misaligned panels) that can lead to damage over time.
Cleaning & Upkeep: Low-Cost Maintenance in Urban Pollution or Coastal Salt Spray Environments
Proper cleaning and upkeep are essential for maintaining the beauty and durability of your kinetic wall, especially in harsh environments like urban areas (with high levels of pollution) or coastal regions (with salt spray). These environments can cause dirt, grime, and corrosion to build up on the panels and hardware, reducing rust resistance, damaging the surface, and shortening the lifespan of the system. The good news is that with low-cost, regular maintenance, you can keep your kinetic wall shimmering for years, even in these challenging environments. This section will answer the长尾关键词 “How to clean wind-driven wall panels” and provide practical, low-cost maintenance tips, integrating core keywords like kinetic facade maintenance cost and wind-driven wall durability, as well as LSI terms like rust resistance, corrosion protection, and stainless steel fasteners.
4.1 Understanding the Impact of Harsh Environments
Before we dive into cleaning and maintenance tips, it’s important to understand how urban pollution and coastal salt spray affect your kinetic wall:
Urban Pollution: Urban areas are filled with pollutants like dust, dirt, smoke, and industrial emissions. These pollutants can accumulate on the kinetic panels, creating a dull, grimy appearance. Over time, acidic pollutants can also damage the panel’s surface, especially if the panels are made from aluminum or steel. Pollutants can also get into the mounting system, causing friction, noise, and damage to the stainless steel fasteners and mounting brackets.
Coastal Salt Spray: Coastal regions have high levels of salt in the air, which can cause corrosion and rust on metal components (like stainless steel fasteners, brackets, and panels). Salt spray can also leave a white, crusty residue on the panels, reducing their shimmer and beauty. Even stainless steel is not completely immune to salt corrosion, so regular maintenance is critical for ensuring rust resistance and wind-driven wall durability.
The key to low-cost maintenance is to clean and inspect your kinetic wall regularly, preventing the buildup of dirt, grime, and salt. This will reduce the need for costly repairs or replacements later on. The frequency of cleaning will depend on your environment: in urban areas, you should clean your kinetic wall every 3-6 months; in coastal areas, you should clean it every 1-3 months to remove salt residue.
4.2 Low-Cost Cleaning Tips for Wind-Driven Wall Panels
Cleaning wind-driven wall panels doesn’t have to be expensive or time-consuming. With a few simple tools and materials, you can keep your panels clean and shimmering. Here’s a step-by-step guide to cleaning your kinetic wall:
Step 1: Gather Your Cleaning Supplies. You’ll need: a soft-bristled brush (or a microfiber cloth), a bucket of warm water, mild detergent (like dish soap), a hose (for outdoor installations), and a dry microfiber cloth. Avoid using harsh chemicals (like bleach or ammonia), abrasive cleaners, or stiff-bristled brushes, as these can damage the panel’s surface and reduce rust resistance.
Step 2: Remove Loose Debris. Start by using the soft-bristled brush or microfiber cloth to remove any loose dirt, dust, or debris from the panels. This will prevent scratching the surface when you wash the panels. Pay special attention to the edges of the panels and the mounting brackets, where debris tends to accumulate.
Step 3: Wash the Panels. Mix a small amount of mild detergent with warm water in the bucket. Dip the soft-bristled brush or microfiber cloth into the soapy water and gently scrub the panels in a circular motion. Be careful not to scrub too hard, as this can scratch the surface. For stubborn stains (like bird droppings or oil), let the soapy water sit on the stain for a few minutes before scrubbing.
Step 4: Rinse the Panels. For outdoor installations, use a hose to rinse the panels thoroughly with clean water, removing all soap residue. For indoor installations, use a clean, damp cloth to rinse the panels. Soap residue can attract dirt and grime, so it’s important to rinse thoroughly.
Step 5: Dry the Panels. Use a dry microfiber cloth to dry the panels, preventing water spots. Water spots can be especially noticeable on shiny panels, so drying is an important step. Pay special attention to the edges and corners of the panels, where water tends to collect.
Step 6: Clean the Mounting Brackets and Fasteners. Don’t forget to clean the mounting brackets and stainless steel fasteners. Use a soft brush to remove any dirt or debris from the brackets, and wipe them down with a damp cloth. For coastal areas, you can also use a mixture of water and vinegar (1 part vinegar to 4 parts water) to remove salt residue from the brackets and fasteners. This will help prevent corrosion and maintain rust resistance.
4.3 Low-Cost Maintenance Tips for Long-Term Durability
In addition to regular cleaning, there are several low-cost maintenance tips you can follow to ensure the long-term durability of your kinetic wall, especially in harsh environments:
1. Inspect Regularly: Inspect your kinetic wall every 1-3 months (depending on the environment) for signs of damage, corrosion, or loose fasteners. Look for rust on the stainless steel fasteners and brackets, cracks or dents in the panels, and loose or missing shock-absorbing pads. Catching these issues early will prevent them from becoming more serious and costly to repair.
2. Touch Up Paint or Coating: If your kinetic wall panels have a painted or coated surface, touch up any chips or scratches with matching paint or coating. This will protect the panels from corrosion and maintain their appearance. Paint touch-up kits are available from most kinetic wall manufacturers and are relatively inexpensive.
3. Apply Corrosion Protection: For coastal areas or areas with high humidity, apply a thin layer of corrosion protection spray to the stainless steel fasteners and brackets. This spray will help prevent rust and corrosion, extending the life of the hardware. Corrosion protection sprays are available at most hardware stores and are easy to apply.
4. Replace Worn Parts: Over time, shock-absorbing pads, fasteners, and other small parts may wear out. Replace these parts as needed to ensure the smooth operation of your kinetic wall. Most replacement parts are inexpensive and easy to install, making this a low-cost maintenance task.
5. Trim Vegetation: If your kinetic wall is installed near trees or bushes, trim the vegetation regularly to prevent leaves, branches, or debris from getting stuck in the panels or mounting system. This will reduce friction, noise, and damage to the system.
6. Protect During Extreme Weather: In areas prone to extreme weather (like hurricanes, typhoons, or heavy snow), take steps to protect your kinetic wall. For example, you can temporarily remove the panels or secure them with additional fasteners to prevent damage. This will help ensure wind-driven wall durability and reduce maintenance costs.
Table 5 below outlines a low-cost maintenance schedule for kinetic walls in different environments, helping you stay on top of cleaning and upkeep without breaking the bank.
| Environment | Cleaning Frequency | Inspection Frequency | Additional Maintenance Tasks |
|---|---|---|---|
| Urban (Low Pollution) | Every 6 months | Every 3 months | Touch up paint as needed; tighten fasteners |
| Urban (High Pollution) | Every 3 months | Every 2 months | Clean brackets and fasteners; touch up paint |
| Coastal (Mild Salt Spray) | Every 2 months | Every 1 month | Apply corrosion protection; remove salt residue |
| Coastal (Heavy Salt Spray) | Every 1 month | Every 2 weeks | Apply corrosion protection monthly; replace worn fasteners |
By following this low-cost maintenance schedule, you can keep your kinetic wall in top condition, even in harsh environments. The key is to be proactive—regular cleaning and inspection will prevent small issues from becoming big problems, reducing kinetic facade maintenance cost and ensuring wind-driven wall durability for years to come.
Weather Resistance: Can They Withstand Hurricanes/Typhoons? (Explaining Wind Resistance Ratings)
For many kinetic wall owners, especially those in coastal or hurricane-prone areas, a critical question is: “Can kinetic walls withstand hurricanes or typhoons?” The answer depends on the wind resistance rating of the system, the quality of the installation, and the materials used. Wind resistance is a key factor in wind-driven wall durability, and understanding wind resistance ratings is essential for choosing the right kinetic wall for your location. This section will explain wind resistance ratings, discuss how kinetic walls are tested for hurricane/typhoon resistance, and provide tips for ensuring your kinetic wall can withstand extreme weather, integrating core keywords like wind-driven wall durability and wind load requirements for kinetic facades, as well as LSI terms like structural integrity, stainless steel fasteners, and corrosion protection.
5.1 Understanding Wind Resistance Ratings
Wind resistance ratings (also known as wind load ratings) measure a kinetic wall’s ability to withstand wind forces. These ratings are typically expressed in miles per hour (mph) or kilometers per hour (km/h) and indicate the maximum wind speed the system can withstand without damage. Most kinetic wall manufacturers test their systems to meet specific wind resistance standards, such as those set by the American Society of Civil Engineers (ASCE) or the International Building Code (IBC).
The wind resistance rating of a kinetic wall depends on several factors, including: the material of the panels (aluminum, stainless steel, polycarbonate), the design of the panels (flexible vs. rigid), the strength of the mounting brackets and stainless steel fasteners, and the overall structural integrity of the system. For example, a heavy-duty kinetic wall with stainless steel panels and reinforced mounting brackets may have a wind resistance rating of 120 mph, while a lightweight aluminum system may have a rating of 90 mph.
It’s important to note that wind resistance ratings are not just about the panels—they also include the mounting system. Even the strongest panels will fail if the mounting brackets or fasteners are not strong enough to withstand wind forces. This is why proper installation and high-quality hardware are critical for wind-driven wall durability.
Table 6 below outlines common wind resistance ratings for kinetic walls and the types of weather they can withstand, helping you choose the right system for your location.
| Wind Resistance Rating (mph) | Weather Condition | Suitable Locations | System Features |
|---|---|---|---|
| 70-80 | Mild to moderate winds; occasional gusts | Inland areas; low-wind regions | Lightweight aluminum panels; standard brackets |
| 80-90 | Moderate to high winds; rare gusts up to 100 mph | Suburban areas; mild coastal regions | Aluminum or polycarbonate panels; reinforced brackets |
| 90-100 | High winds; occasional tropical storms | Coastal areas; areas prone to tropical storms | Heavy-duty aluminum panels; stainless steel fasteners |
| 100-120+ | Hurricanes (Category 1-3); typhoons |